Creating a Devuan qcow2 image and launching a virtual environment from Terraform, with a bonus
Hello, it's me, the incompetent one. There weren't many articles about Terraform, so I decided to write one.
Background
I often heard the name Terraform, but I didn't really grasp what it was, so I thought I'd try it out.
Additionally, since it seems that qcow2 images, which are virtual disk images for qemu, can also be used, I thought, 'Hey, this might work in my own environment!'
If I can do this, it seems easy to set up a test environment for my current production server. My home server, which I started on a whim, has become quite active, so I want to increase its uptime as much as possible. Being able to easily deploy virtual environments is very reassuring.
Virtual environments are, well, virtual environments, and I always thought they were a hassle... so I kept putting it off. But thanks to Terraform, I thought that perception might change, so I'm doing it.
The hassle is that I have to remember all the options for virsh and qemu, and even the qemu startup options are tedious. I want to solve that with Terraform.
Creating a qcow2 image
First, I will create a Devuan qcow2 image.
wget https://files.devuan.org/devuan_daedalus/installer-iso/devuan_daedalus_5.0.1_i386_netinstall.iso
qemu-img create -f qcow2 devuan.qcow2 10G
 sudo chown libvirt-qemu:libvirt-qemu devuan.qcow2 devuan_daedalus_5.0.1_i386_netinstall.iso
sudo chmod 644 devuan.qcow2 devuan_daedalus_5.0.1_i386_netinstall.iso
sudo virt-install --name devuan --ram 1024 --disk path=./devuan.qcow2,size=10 --vcpus 1 --os-type linux --os-variant debian10 --network bridge=virbr0 --graphics vnc --console pty,target_type=serial --cdrom devuan_daedalus_5.0.1_i386_netinstall.iso
This will show that the installation is in progress, so connect and complete the installation.
sudo virt-viewer --connect qemu:///system devuan

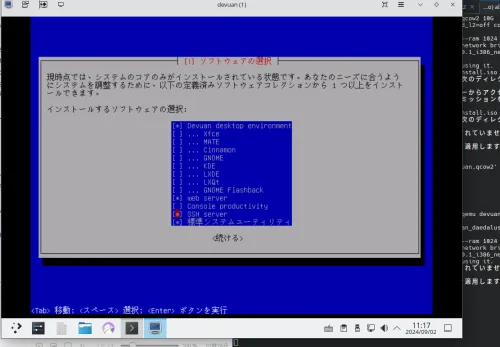
It's a bit complicated, but this screen is from ThinkPad X1 (where I'm operating) - VNC → ArtixLinux on my custom PC - virt-viewer → Devuan on the virtual environment.
If you want to edit the image after installation,
sudo qemu-system-x86_64 -m 2G -smp 2 -drive file=devuan.qcow2,format=qcow2 -net nic -net user -vnc `0 -enable-kvm
then connect via VNC on port 5900.
vncviewer 192.168.10.100:5900
Now the qcow2 image is ready.
Terraform Configuration and Startup
I wrote the following in vim main.tf:
  terraform {
  required_providers {
    libvirt = {
      source  = "dmacvicar/libvirt"
      version = "~> 0.7.1"
    }
  }
}

provider "libvirt" {
  uri = "qemu:///system"
}

resource "libvirt_volume" "devuan_qcow2" {
  name   = "devuan.qcow2"
  source = "./devuan.qcow2"
  format = "qcow2"
}

resource "libvirt_domain" "devuan_vm" {
  name   = "devuan-vm-new"
  memory = "1024"
  vcpu   = 2

  network_interface {
    network_name = "default"
  }

  disk {
    volume_id = libvirt_volume.devuan_qcow2.id
  }

  console {
    type        = "pty"
    target_port = "0"
    target_type = "serial"
  }

  graphics {
    type        = "vnc"
    listen_type = "address"
  }
}
Now, let's start it up.
terraform init
terraform plan
terraform apply
Once it's up, I'll log into the virtual environment.
Checking the IP.
$ sudo virsh domifaddr devuan-vm-new
 名前     MAC アドレス     プロトコル     アドレス
-------------------------------------------------------------------------------
 vnet13     52`54`00`0a`e9`bc    ipv4         192.168.122.216/24
Confirmed. Let's log in.
$ ssh -l taro 192.168.122.216
The authenticity of host '192.168.122.216 (192.168.122.216)' can't be established.
ED25519 key fingerprint is SHA256`VAjob/o7gQXvmeNUodajSfdBky0eXd0RTwomP1wHtWk.
This host key is known by the following other names/addresses`
    ~/.ssh/known_hosts`5` 192.168.122.83
    ~/.ssh/known_hosts`6` 192.168.122.163
    ~/.ssh/known_hosts`7` 192.168.122.162
Are you sure you want to continue connecting (yes/no/[fingerprint])? yes
Warning` Permanently added '192.168.122.216' (ED25519) to the list of known hosts.
taro@192.168.122.216's password`
Linux devuan 6.1.0-25-686 #1 SMP PREEMPT_DYNAMIC Debian 6.1.106-3 (2024-08-26) i686

The programs included with the Devuan GNU/Linux system are free software;
the exact distribution terms for each program are described in the
individual files in /usr/share/doc/*/copyright.

Devuan GNU/Linux comes with ABSOLUTELY NO WARRANTY, to the extent
permitted by applicable law.
taro@devuan`~$
OK! I plan to try setting up multiple instances another day.
And then I'll destroy the instance.
terraform destroy
Bonus: Redistributing qcow2 images
Since there was no official Devuan qcow2 image for the latest version, I created one this time, and I'm hosting and redistributing it below.
It's everyone's favorite bonus.
https//files.soulminingrig.com
Please log in with the following:
user : taro
password : toor
Note that the password is the same as the official Devuan default root password.
That's all for now. Thank you.
By the way, this is the second time I'm writing this article because I accidentally deleted it. Tee-hee.