建立 Devuan 的 qcow2 映像檔並從 Terraform 啟動虛擬環境 附贈品
大家好,我是無能。因為關於Terraform的文章不多,所以我就寫一篇。
緣由
雖然經常聽到Terraform這個名字,但不太有概念,所以想試著玩玩看。
此外,聽說也可以使用qemu的虛擬磁碟映像檔qcow2映像檔,所以我想這在我的環境中應該也行得通吧?
如果能做到這一點,就可以輕鬆地作為目前實際運行伺服器的測試環境。因為當初隨意開始的家用伺服器現在運行得相當不錯,所以希望能盡可能提高運行率,能夠輕鬆部署虛擬環境讓我感到很安心。
總之,虛擬環境就是虛擬環境,雖然覺得很麻煩...一直拖延著,但我想多虧了Terraform,這種印象可能會消失,所以決定動手做。
所謂的麻煩,就是必須完全記住virsh和qemu的選項,甚至連啟動qemu的選項都很麻煩。我想用Terraform來解決這個問題。
建立 qcow2 映像檔
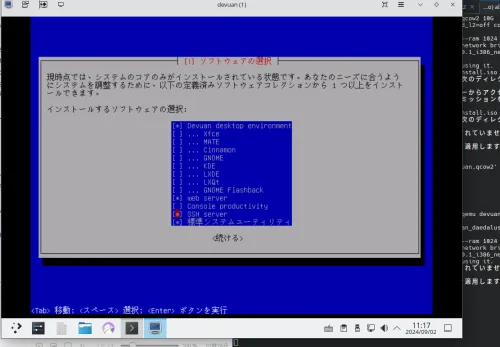
首先,建立Devuan的qcow2映像檔。
wget https://files.devuan.org/devuan_daedalus/installer-iso/devuan_daedalus_5.0.1_i386_netinstall.iso
qemu-img create -f qcow2 devuan.qcow2 10G
 sudo chown libvirt-qemu:libvirt-qemu devuan.qcow2 devuan_daedalus_5.0.1_i386_netinstall.iso
sudo chmod 644 devuan.qcow2 devuan_daedalus_5.0.1_i386_netinstall.iso
sudo virt-install --name devuan --ram 1024 --disk path=./devuan.qcow2,size=10 --vcpus 1 --os-type linux --os-variant debian10 --network bridge=virbr0 --graphics vnc --console pty,target_type=serial --cdrom devuan_daedalus_5.0.1_i386_netinstall.iso
這樣就會顯示正在安裝的畫面,請連接並完成安裝。
sudo virt-viewer --connect qemu:///system devuan

這有點複雜,這個畫面是從操作中的ThinkPad X1 - VNC → 自組電腦的ArtixLiunx - virt-viewer → 虛擬環境中的Devuan的畫面。
如果在安裝後想編輯映像檔,請使用以下指令:
sudo qemu-system-x86_64 -m 2G -smp 2 -drive file=devuan.qcow2,format=qcow2 -net nic -net user -vnc `0 -enable-kvm
然後透過VNC的5900埠連接。
vncviewer 192.168.10.100:5900
這樣qcow2映像檔就準備好了。
Terraform 的設定與啟動
我用vim main.tf
寫入了以下內容。
  terraform {
  required_providers {
    libvirt = {
      source  = "dmacvicar/libvirt";
      version = "~> 0.7.1";
    }
  }
}

provider "libvirt" {
  uri = "qemu:///system";
}

resource "libvirt_volume" "devuan_qcow2" {
  name   = "devuan.qcow2";
  source = "./devuan.qcow2";
  format = "qcow2";
}

resource "libvirt_domain" "devuan_vm" {
  name   = "devuan-vm-new";
  memory = "1024";
  vcpu   = 2;

  network_interface {
    network_name = "default";
  }

  disk {
    volume_id = libvirt_volume.devuan_qcow2.id;
  }

  console {
    type        = "pty";
    target_port = "0";
    target_type = "serial";
  }

  graphics {
    type        = "vnc";
    listen_type = "address";
  }
}
接下來就啟動它。
terraform init
terraform plan
terraform apply
啟動後,登入虛擬環境。
確認IP。
$ sudo virsh domifaddr devuan-vm-new
 名稱     MAC 位址     協定     位址
-------------------------------------------------------------------------------
 vnet13     52`54`00`0a`e9`bc    ipv4         192.168.122.216/24
已確認。現在登入吧。
$ ssh -l taro 192.168.122.216
The authenticity of host '192.168.122.216 (192.168.122.216)' can't be established.
ED25519 key fingerprint is SHA256`VAjob/o7gQXvmeNUodajSfdBky0eXd0RTwomP1wHtWk.
This host key is known by the following other names/addresses`
    ~/.ssh/known_hosts`5` 192.168.122.83
    ~/.ssh/known_hosts`6` 192.168.122.163
    ~/.ssh/known_hosts`7` 192.168.122.162
Are you sure you want to continue connecting (yes/no/[fingerprint])? yes
Warning` Permanently added '192.168.122.216' (ED25519) to the list of known hosts.
taro@192.168.122.216's password`
Linux devuan 6.1.0-25-686 #1 SMP PREEMPT_DYNAMIC Debian 6.1.106-3 (2024-08-26) i686

The programs included with the Devuan GNU/Linux system are free software;
the exact distribution terms for each program are described in the
individual files in /usr/share/doc/*/copyright.

Devuan GNU/Linux comes with ABSOLUTELY NO WARRANTY, to the extent
permitted by applicable law.
taro@devuan`~$
OK!之後我會嘗試建立多個實例。
然後,我會銷毀這個實例。
terraform destroy
附贈:qcow2 映像檔的重新分發
由於Devuan官方的qcow2映像檔沒有最新版本,所以我這次自己製作了,並在以下網址進行託管和重新分發。
這是大家最喜歡的附贈品。
https//files.soulminingrig.com
請使用以下資訊登入:
user : taro
password : toor
此外,密碼與Devuan官方的預設root密碼相同。
那麼,下次再見。請多關照。
順帶一提,這篇文章我不小心弄丟了,這是第二次寫了。吐舌。